Sunday, March 30, 2008

Granola Recipe - Sow Those Oats!


Sunny Saturday mornings usually find me with undeniable cravings for good food. Depending on the circumstances, I balance simplicity of preparation with speed to the table. On Saturday it's usually a toss-up between pancakes and granola.

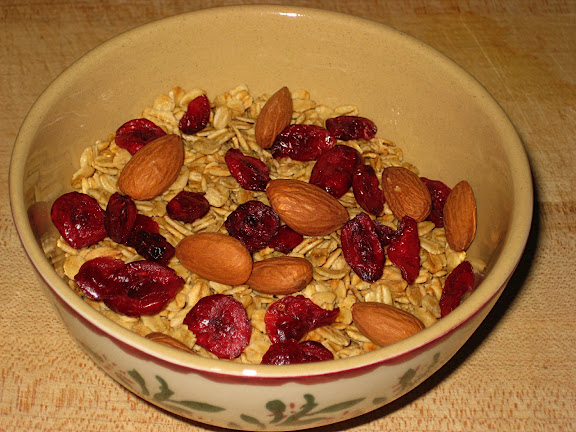
I love good granola, and this is my basic recipe.

Basic Granola Recipe

4-6 cups of organic oats
1/3 cup of oil (or mix of a few, e.g., olive, canola)
1/2 - 1 cup of sweetener (or mix a couple, e.g., agave nectar, maple syrup, honey, brown sugar)
1/4-1/2 cup of warm water
A pinch or two of salt

Everything hinges on the quantity of oats you're dealing with. Aim on the high side of the ingredients list for 6 cups, on the low side if using 4 cups. As always, taste as you go and adjust as necessary. If you like your granola sweeter, then make it so! Feel the power!

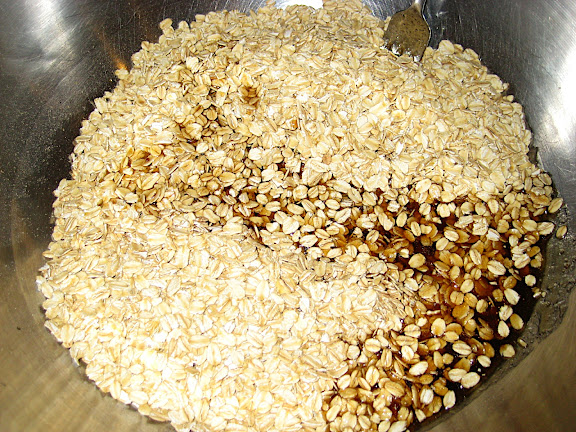
Mix the oil(s), sweetener(s), water and salt. Sometimes for fun I see if I can emulsify the mixture, but this isn't necessary (I'm maniacal but usually not dangerous with a whisk). Next pour it over the oats and mix until coated and soaked. Now would be a good time to taste it. If it tastes like your horse's feedbag, add some more sweetener! ;-)

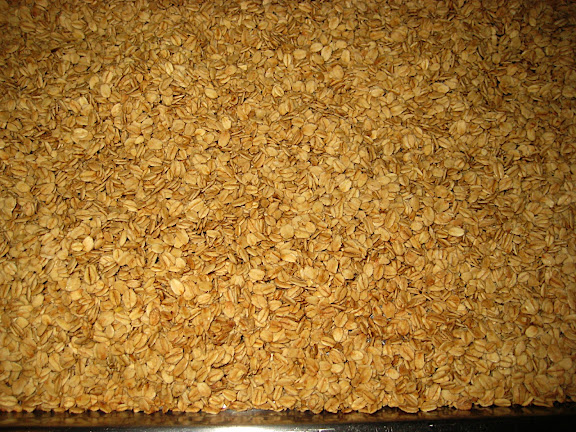
Now spread the mix on a baking sheet and bake for 30-60 minutes at 350-425F (depending on how fast you want to be done).

Turn occasionally at 10 minute intervals. When golden brown, remove from oven let it cool for about 10 minutes until it's crispy, then serve. Store in an airtight container for a week or more. Yummy!


Pizzeria Delfina


Last Sunday brought divine weather to San Francisco, along with the opportunity to make a great day in the Mission nearly perfect with a visit to Pizzeria Delfina. I've been looking forward to this visit after hearing rave reviews of both Pizzeria Delfina and Delfina--the sister restaurant located next door.


Both restaurants are owned by Craig and Anne Stoll. Craig has just been nominated for a James Beard chef of the year award, and with pizza like this, it no wonder--this is some of the best pizza I've ever eaten.

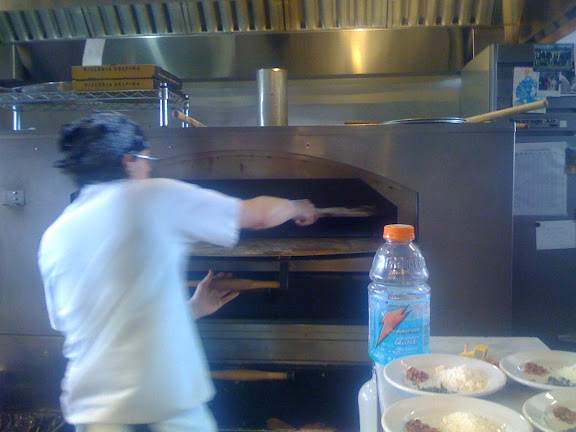
The pizzeria was busy even at three o'clock on a Sunday afternoon. All the tables were filled with happy diners, but luckily some space was available at the bar. This provided an excellent vantage point to watch the pizzas being made, and to meet the folks making them.

Anthony Strong is the pizziaolo, and was kind enough to let me take photos of my visit. They are cooking up some *kind* pizza over there at Pizzeria Delfina--it's like being in Naples!

Anthony Strong, pizzaiolo at Pizzeria Delfina. Brandon, who made my pizza, just calls him "jefe". Just keep making these great pizzas, I'll call you whatever you want!

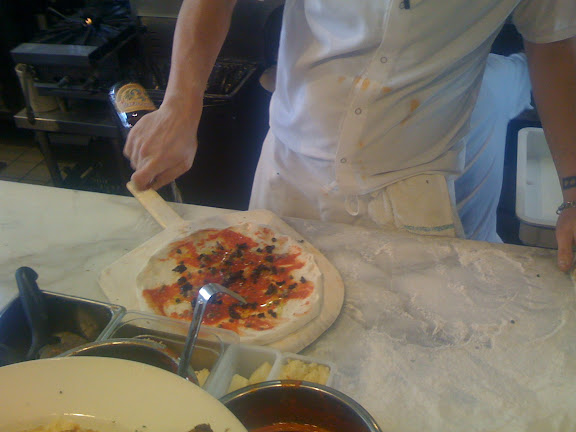
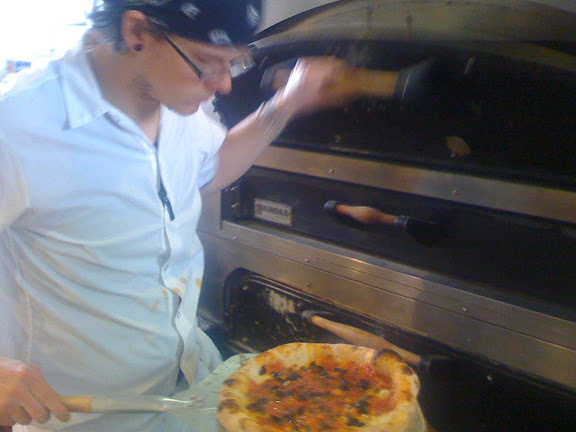
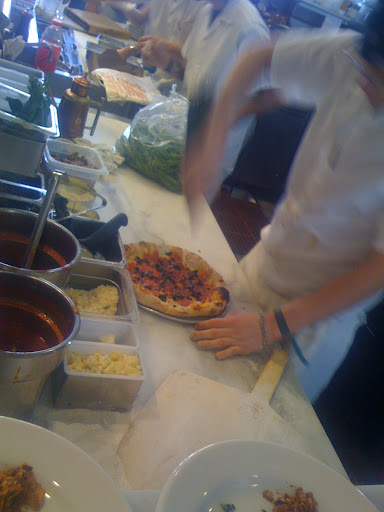
Here is some time-lapse photography of my pizza being made--the best I could do with the camera in my iPhone. I ordered the pizza Napoletana--tomato, anchovies, capers, hot peppers, olives and oregano. 

This is Brandon making my pizza (according to Brandon, I'm the first person ever to remember how to spell his name correctly!)

Here is my glorious pizza headed into the oven...

And checking on it a few minutes later...


And finally perfect, and ready to cut--go Brandon!


And finally, the moment of truth: this pizza was fantastic. Crisp, thin crust with slightly puff, chewy edges. The crust had a very slightly yeasty complexity, and the crispy chewiness had me saying, "Scandalous!" out loud. To wit:

Mmmm. Scandalously good!

In addition to the great pizza, they've got some pretty amazing antipasti in the display case and several great wines to choose from. 

Alright, enough said--get yourself over to Pizzeria Delfina as fast as you can--this place is fantastic.


Sunday, March 23, 2008

Root Vegetable Bliss


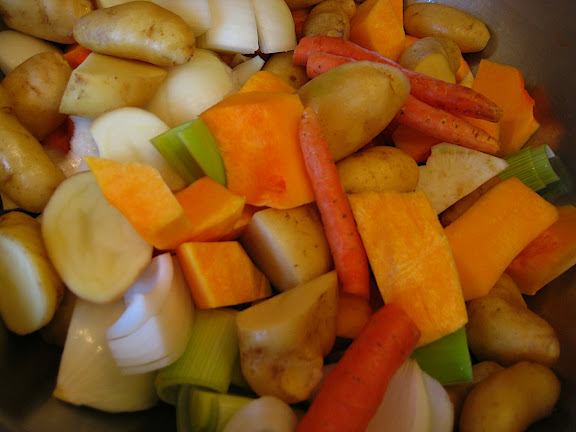
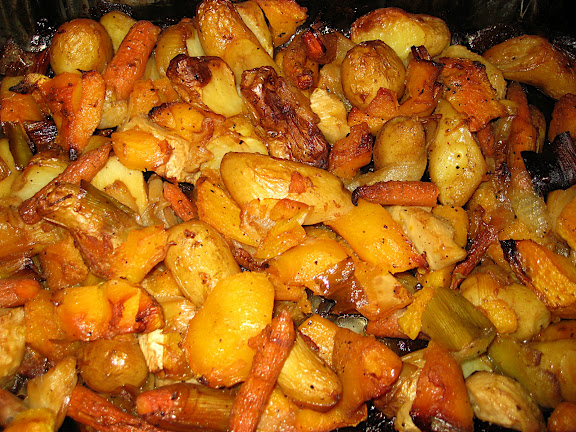
Despite my best efforts, I sometimes fall behind with all the good eats that come every week in my CSA box from Full Belly Farm. Today I was a little overwhelmed with root vegetables, and decided to make quick, delicious work of them. Here's the scandal:

Root Vegetable Bliss

Enormous quantities of any and/or all of the following:
Celery root
Carrots
Potatoes 
Onions
Leeks
Butternut squash

Wash and chop as necessary (note those yummy baby carrots floating around in there), and douse with some good extra virgin olive oil, salt and pepper. Bake at 450F for a few minutes to get things hoppin', and to release some of those volatiles from the onions--wheweee yer house is gonna smell good. Then bake on 350F for a couple hours, stirring occasionally to brown evenly. 

That's it. Welcome to root vegetable bliss. 

San Francisco Sourdough Pizza Dough

My supply of instant yeast stopped working for me at an inopportune moment--just when I was going to make a batch of pizza dough. 

Luckily, many moons ago I went through a sourdough baking phase and whipped up a batch of San Francisco Sourdough barm. I started with fresh grapes from Full Belly Farm to harvest the yeast from the grape skins, and also used Full Belly's fresh stone ground red wheat flour as the basis for the barm. 

I'd never started a pizza dough using barm, but guessed it would be fine to start with about 1/4 cup of the thick barm, mixed with 1/4 cup of water to thin it out a bit. 
I let that warm up to room temperature until it was bubbly, about 6 hours. Then I used that instead of yeast in my standard pizza dough recipe. The rise was a little slower than with instant yeast, and not as pronounced. 

I made the first pizza the same day I made the dough. It was delicious, with a slight sourdough flavor. It was crispier than my normal dough, and not quite as chewy on the edge of the crust. The real fun came on day 3 of the dough. I used the last of the dough, and the pizza crust was amazing! It had just the right about of sourness to lend it a bit of character, and it was a bit chewier as well. Yum!

Sunday, March 16, 2008

Penny Wise and a Pound of Poolish

Last week before I set out on the wood-fired pizza adventure, I started a new batch of pizza dough following a different recipe than my own: I used one based on a poolish starter from Peter Reinhart's excellent bread baking book Crust & Crumb: Master Formulas for Serious Bread Bakers.

Without going into too much detail, it turned out delicious. It had a fairly crispy bottom but less chewiness at the edge than I like. This might be due to my choice of flour for that batch--I didn't have any bread flour, and used an all-purpose flour from King Arthur Flour Company. I think if I had used a higher-gluten flour, the results would have been even better.

I did indeed end up with a pound of poolish. Luckily in addition to making pizza dough, you can use a poolish as the base for many great breads, including foccacia! Yum!

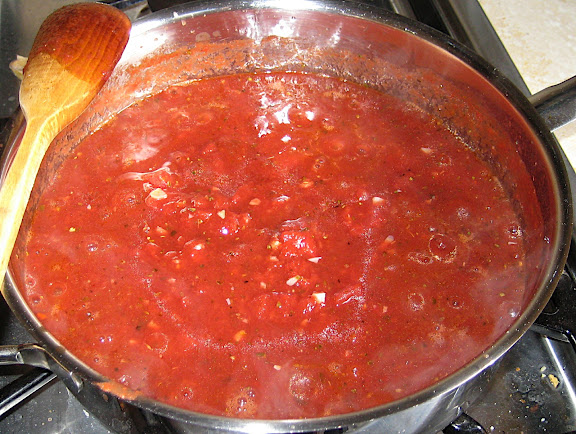
Outrageously Good Pizza Sauce Recipe

It goes without saying that you should be using fresh, local and organic ingredients whenever possible. Just do it--your body, neighbors, local farmers, and friends you cook pizza for with thank you.

Outrageously Good Pizza Sauce Recipe
Note: This recipe is for times when you want a zesty, powerful sauce. The garlic will speak to you here. Toppings used with this sauce will need to bring powerful personalities of their own to the party!

Ingredients:

Extra virgin olive oil
Ridiculous quantities of chopped garlic
About 4 cups of tomato puree
A significant quantity of good red wine
Herbs & Spices: 
Lots of oregano
Judicious quantities of red chilies, salt and fresh ground black pepper
Possibly: a tiny bit of sweetener, depending on the sweetness of your tomatoes

Saute the garlic and spices briefly in the olive oil. Before the garlic browns, add the tomato puree and red wine. Heat through and taste--if it tastes like it needs a little sweetener, add a tiny bit, stir and taste again. If you add too much, it's all over. :)

Simmer the sauce until it thickens. How thick, you ask? Well it depends somewhat on how hot your oven will be when you cook your pizza. If you're cooking at 800F (you lucky, you) then leave your sauce a little thin. If you're cooking at a paltry 550F, it can be a little thicker.

That's really it. 


Wood Fired Pizza

I baked pizza in a wood fired brick oven last weekend thanks to my kind and adventurous friend Ross. It turns out that in his veritable jungle of a backyard in Los Altos stands a nicely appointed oven.

This was my first time closely examining one of these, and I was impressed. It had a built-in digital thermometer system for monitoring the oven temperature at six different spots in the oven. It also had a nice built-in gutter for sweeping ash easily (which we of course didn't notice until after we had cleaned out the ashes from the previous use).


Ross had never used the oven, but has heard that the previous residents of his house would fire it up regularly and then host the neighborhood for much baking and feasting.

Once we had it cleaned out, we set about lighting a fresh blaze. Naturally, neither of us had any matches or a lighter. After a failed attempt to ignite some paper using the electric stove in the kitchen--which resulted in much smoke in the kitchen but no flames suitable for carrying to the backyard at high speed--I made a quick run to a convenience store for a lighter.

The oven was stocked with several bags of hardwood charcoal, but we thought we would try first with the kindling that accompanied the box of small almond wood logs--four of them in all--I had purchased on my way over (those readers that know anything about firing up one of these ovens will also know at this point how misguided I was in this first attempt at using a wood fired oven ).

After a few attempts, we finally got the blaze going. Just to be on the safe side, we also filled a chimney starter with charcoal and lit it, with plans to add those coals to the fine almond wood blaze at some point.


Well, it turns out the almond wood I paid top dollar for was not seasoned, and it really wasn't going to burn without significant additions of more catalyst. That's when we became more serious about the charcoal option.

What began with a few handfuls of coals turned into an entire bag of charcoal going in the growing inferno. At this point, we were thinking we had some blaze going, and the oven would surely be hot enough to bake pizza in an hour or so. We had started early in the morning, and it was time to break out the espresso!

Initially we thought the thermometer system was broken. It seemed stuck at 52F. Oh well! It seemed plenty hot peering in through the door of the oven. After about 30 minutes, though, it seemed victory was most certainly at hand--the temperature at one of the sampling points was now over 100F! Great!

Well, sort of. The temperature grew slowly to around 200F, and then slowed further. It seemed we needed to add more fuel to the fire. Bag number two of hardwood charcoal went into the blaze (we're talking 25 pound bags of charcoal!), along with the rest of the unseasoned almond.

The temperature finally topped about 350F after another hour, and we were burning through fuel at a rate that had me feeling embarrassed for our outlandish addition of CO2 to the greenhouse gases of the rest of the US. We were also causing quite a bit of low-level wood smoke in the neighborhood, so much that at one point we thought the sirens in the distance were actually several fire departments coming to drench our oven--and this dream of wood fired pizza--with water from fire hoses. Luckily, the sirens wailed past the neighborhood and on to more important fires.


While I had read that it can take many hours to heat one of these ovens to serious Neopolitan style pizza making temperatures of 800F-900F, I guess I didn't really believe what I had read. Well, dear reader, take it from me: it takes many hours and a lot of fuel to get one of these ovens really hot!

As luck would have it, the oven was hot enough--at least in the spot covered by our mass of burning coals--to cook pizza. This was good, as we were getting hungry, and I was growing impatient--wood fired pizza already!

So we went ahead and prepped the first test pizza--a simple one with sauce, cheese, and oregano. We pushed the coals aside and in it went, at last!


And this is when I knew that the oven was no where near hot enough. The first pizza took nearly 8 minutes to cook, resulting in a delicious but slightly bready first round.

That's the end of part one of this story. Part two, which I may detail someday, includes 50 more pounds of charcoal and 10 more balls of pizza dough!